
Article · Brandon Warrell
How to colorize a black-and-white or sepia photo in Photoshop
To colorize a black-and-white or sepia photo in Photoshop, scan it in color, neutralize any tint with a Black & White adjustment layer, and repair the damage. Then add each color on its own Solid Color fill layer, set to the Color blend mode, with a mask that limits it to one area. Neural Filters Colorize can give you a quick comparison or a head start, but expect to fix some of what it guesses.
What example does this guide use?
My worked example comes from SCF (State College of Florida) Photoshop coursework in Spring 2025. The brief was to colorize an old family photo and compose the person into a scene that suits them. My source was a sepia photo of my grandmother, taken in Papua New Guinea, reading in a chair. Her skin, clothing and chair were colorized and the contrast was boosted. The steps are a general workflow, not a record of my exact layers and settings.
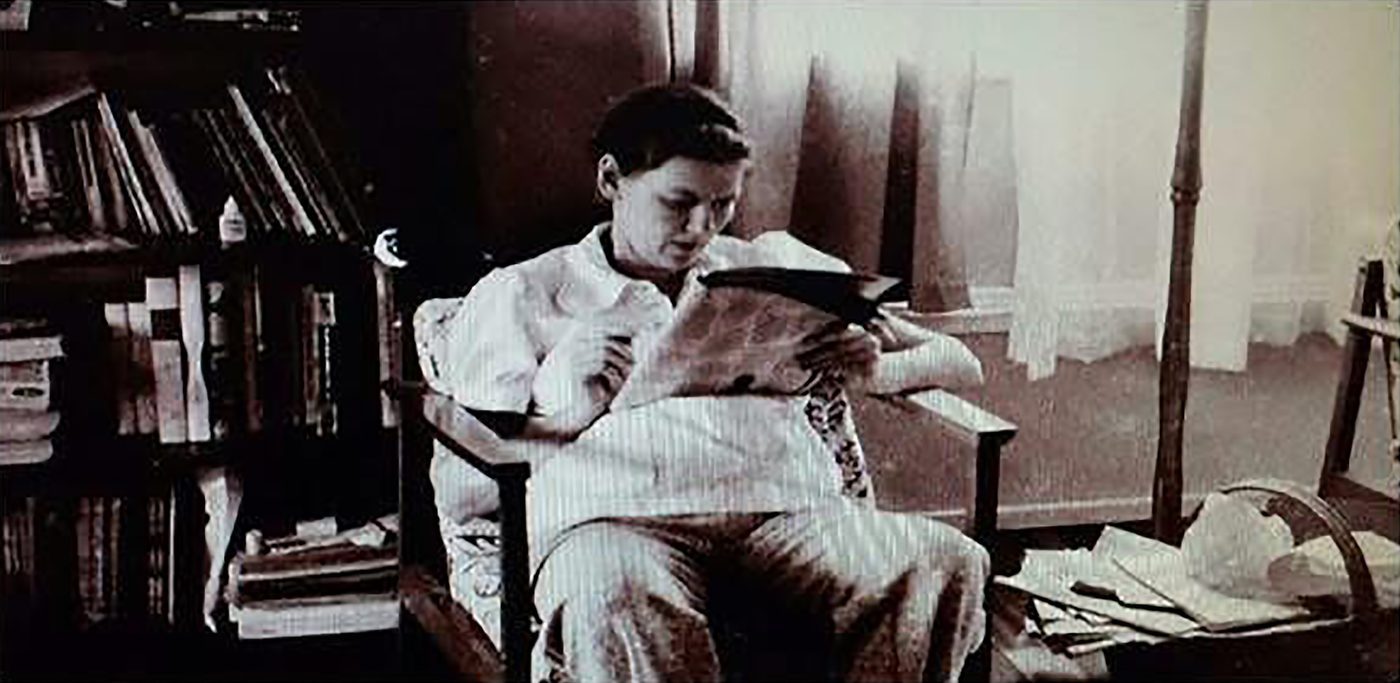
How should you prepare the scan?
Scan in color, even if the photo is sepia or looks black and white. A color scan keeps everything the print holds, and you can neutralize the tint later on an adjustment layer. For restoration or enlargement, scan at 600 ppi and save a TIFF if you can. My guide to scanning old photos covers the rest.
Make sure the document is set to Image > Mode > RGB Color. Grayscale mode leaves you no color to add, and Adobe notes that it can make Neural Filters load indefinitely.
Why remove the sepia tint first?
Sepia is a brown tint over a black-and-white image, and it sits under anything you add on top. Neutralizing that tint helps in three ways:
- A neutral base lets you judge every color you add.
- Soft Light layers mix with what's underneath, so they would pick up the brown.
- Any area you don't color stays a clean gray instead of brown.
Choose Layer > New Adjustment Layer > Black & White and leave the Tint checkbox off. The document stays in RGB, and the adjustment stays editable.
If the print looks flat, add contrast now. A Curves adjustment from the Adjustments panel is one way. A gentle S-curve adds midtone contrast.
How do you repair dust, scratches and cracks?
Repair before you color.
- Dust and small spots: the Spot Healing Brush samples nearby pixels and blends them in. Set the brush slightly larger than the flaw.
- Cracks through detail: the Healing Brush lets you choose the source. Alt-click (Option-click on a Mac) to set a clean source point.
- Larger marks: with the Remove tool, brush over an area or draw a loop around it. Set Mode to Generative AI off if you can, and check that it hasn't invented anything in a face or a hand.
Paint the repairs on a new empty layer directly above the scan, below the adjustment layers, with those adjustments hidden. Turn on Sample All Layers for the Spot Healing Brush and Remove tool, and set Sample to Current & Below for the Healing Brush. Then you can undo a bad patch without touching the original. Turn the adjustments back on when you're done.
How do you add color one area at a time?
Give each area its own layer. In my piece the areas colorized were skin, clothing and chair. Your photo may also need hair, background or other areas.
- Select the top layer, then choose Layer > New Fill Layer > Solid Color and pick a starting color. The fill must sit above the Black & White layer, which would otherwise strip its color.
- Set the layer's blend mode to Color. It keeps the photo's luminance and takes hue and saturation from the layer, so your lights and darks stay put.
- Fill the layer's mask with black, which hides the color.
- Paint white over the area you want to color. Gray gives partial strength, and black takes color back off.
- Double-click the layer's swatch in the Layers panel to change the color at any time.
If Color mode looks flat on an area, try Soft Light. It lightens or darkens the image depending on the color you choose, and it doesn't hold the original luminance the way Color does. A Hue/Saturation adjustment layer with Colorize selected is another route: it applies one hue, and a mask confines it.
Unless family records say otherwise, the colors are an interpretation. I say so in the notes on my photo colorization project, which was SCF coursework.
How do you get believable skin tones?
Take them from a real photo. Open a color reference of a person in similar light next to your work and sample it with the Eyedropper. The sampled color becomes your foreground color.
Then break the skin up. One color across a whole face looks painted on, because real skin shifts between highlights and shadows. Sample a few areas from the reference, such as a lit cheek and a shadowed neck, and give them their own masked layers at partial strength.
Should you use Neural Filters Colorize?
It's worth trying, as a head start or a comparison. Go to Filter > Neural Filters and find Colorize in the panel. Adobe's pages list it under different sections, so check the whole list. On first use, click the cloud icon to download it from Adobe's servers. Turn on the switch next to its name, and it colors the image automatically. Sliders fine-tune the color balance.
Work from a flattened copy of your repaired, neutral file, still in RGB Color, so your hand-built layers stay untouched. Adobe's tips favor images with good contrast and proper exposure. Its known limitations add that some regions may come out the wrong color, pins may not land precisely and lips may look oversaturated.
To correct an area, pick a color below the preview and click the preview to place a pin, which fills the surrounding area with that color. Choose Smart Filter as the output if you want to change the settings later, or New Layer to keep the original pixels separate. Fix anything the pins can't with masked fill layers above it.
How do you check it before printing?
My brief also called for a new background, so she was set into a free-license photo of a library that fits the reading pose. If yours does too, use one you own or are licensed to use (can you use Google Images explains how to tell).
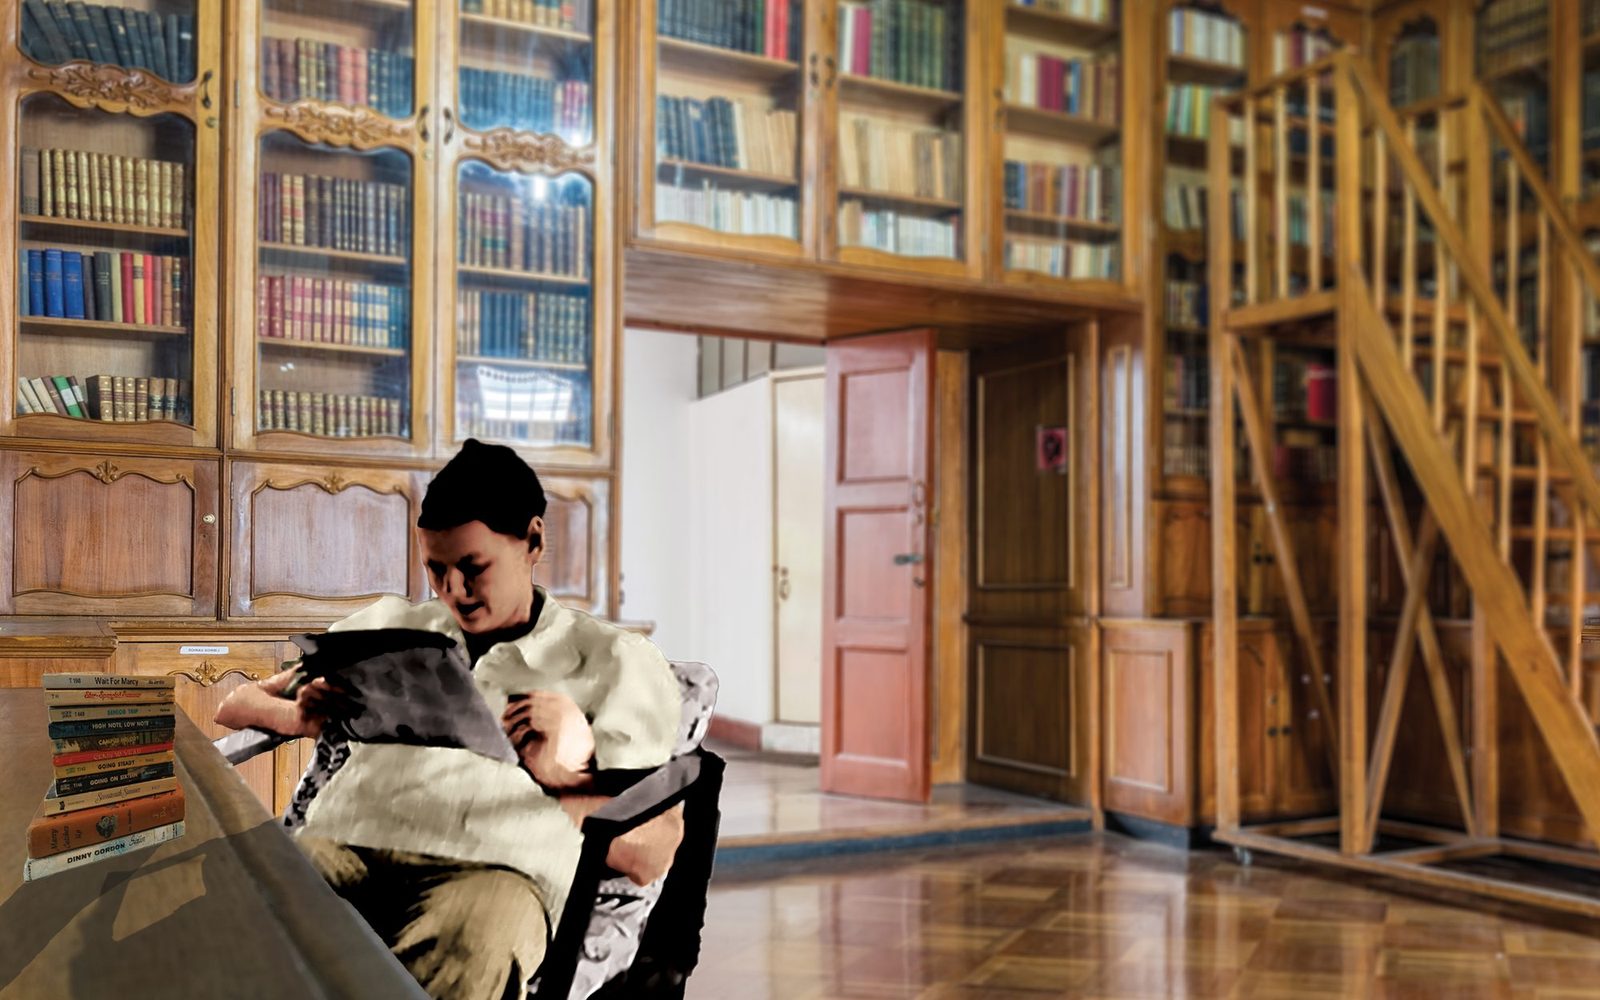
Then check the file at the size it will print. Mine is a 13 × 19 in print. At 300 ppi, a print that size needs about 3,900 × 5,700 pixels. In Image > Image Size, turn off Resample and type your print size to see the resolution you have. Adobe advises 300 ppi for best quality unless your printer requires otherwise. View > Print Size shows the approximate printed size, which varies with your monitor.
Look for color spilling past the mask edges, flat patches of skin and leftover repair marks. Add a last contrast adjustment if the image needs it.
Want someone else to do it?
I offer photo restoration and colorization from $40 per photo. The final price depends on size, detail and how many versions you need. Most projects take 2–4 business days from the time I have your details to the first finished draft, with up to 3 rounds of revisions included. See the colorization project (SCF coursework, not a paid job), the rest of my work or the FAQ.